• Moving to Android.

    Moving to Android.

    People that know me know I’m an “Apple Fan”. I’ve put that in inverted commas because I love my Apple stuff. I love how easy to use and good looking they are. I have a Mac as my main computer. An iPad. An iPhone. Apple TV. The list goes on.

    I’m not the type, however, that likes to bash other peoples preferences. Just because I like something dosent mean everyone else should as well. I play with Ubuntu on my laptop. I mess around with the RasperryPi. I have a radxa. I still use Windows on both a Virtual Machine and in Bootcamp.

    Recently, I’ve started to get frustrated using my iPhone 5. The phone itself is amazing, but it just lacked the customisability that I was after, so I decided to buy a Samsung Galaxy S5.

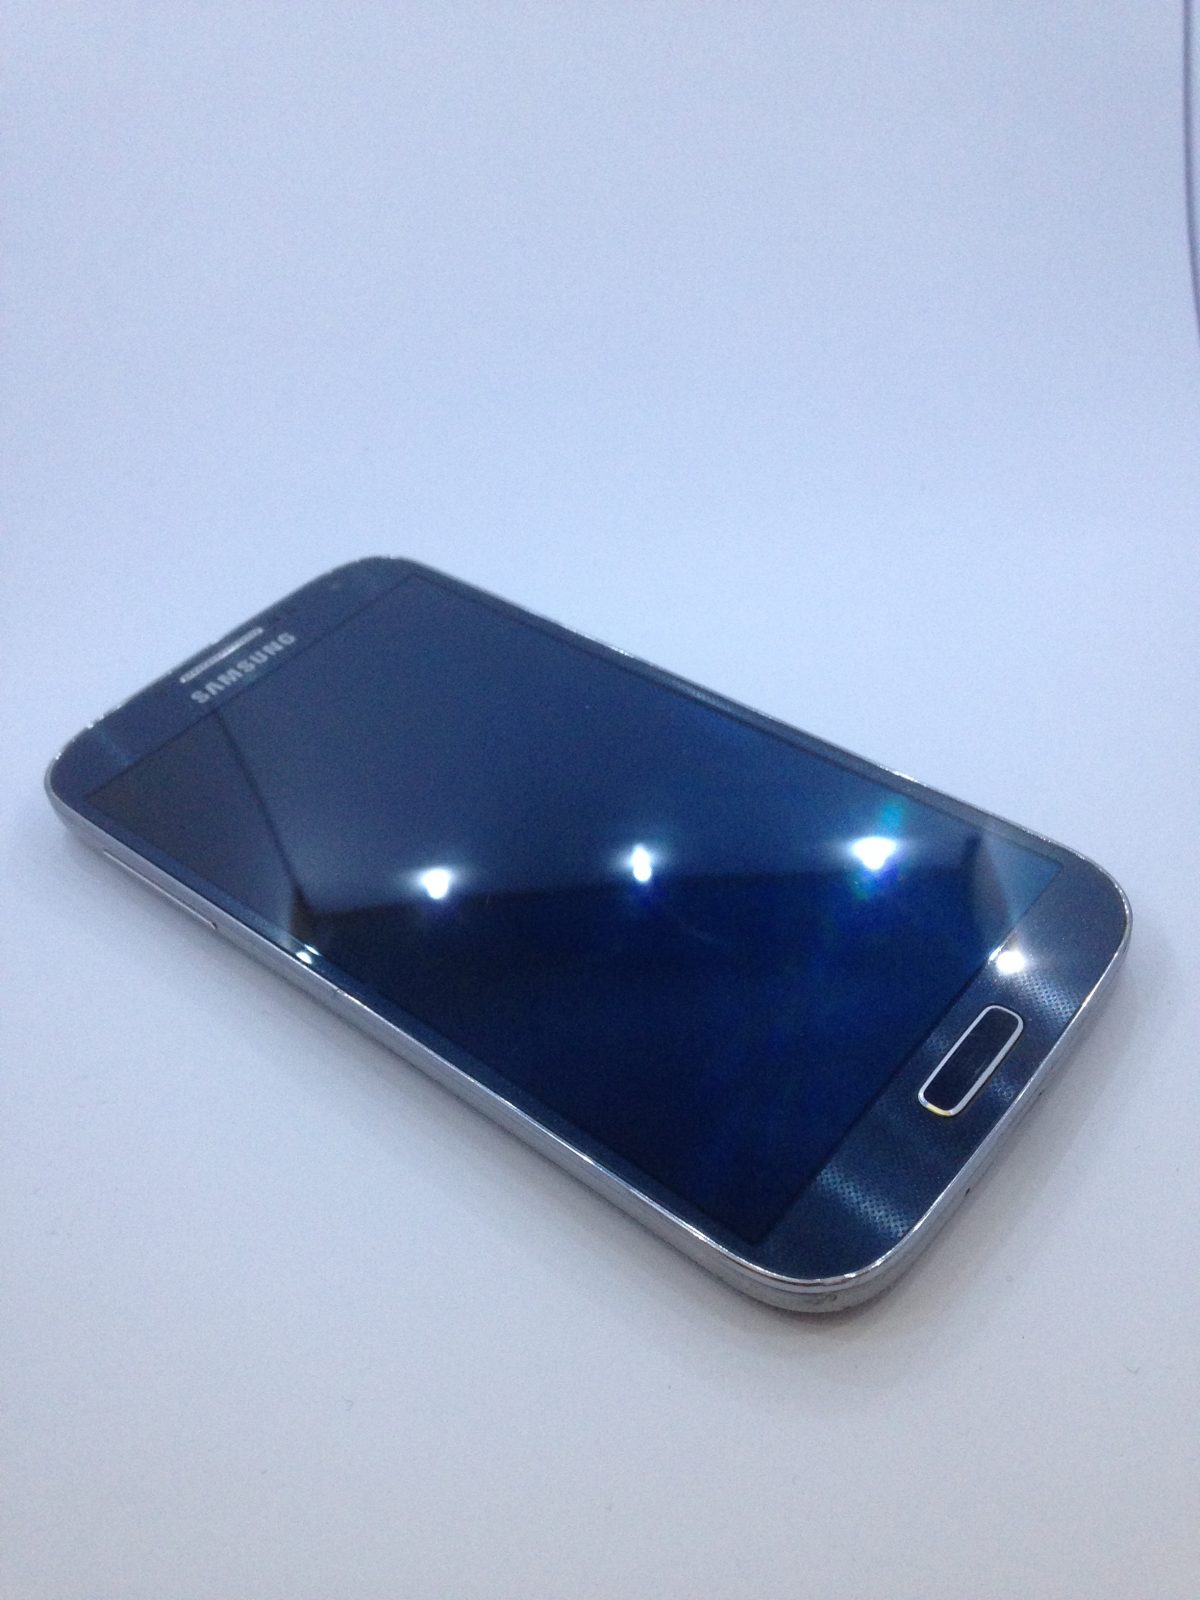
    Now. Before I went out and bought a new mobile on a 24 month contract I figured it might be a good idea to have a play with Android first, then decide if a 24 month contract would work with a new device. After some asking around, I decided to swap my iPhone 5 for a Samsung Galaxy S4. In the whole, it was a fair trade, given that my iPhone had seen a few bumps and drops, and was definitely not in factory-fresh condition!

    Samsung Galaxy S4
    Samsung Galaxy S4

    So. A Samsung Galaxy S4, with a free 32Gb memory card. I was sorted. What follows is my first week’s impressions.

    Right away, I loved the screen size. Its bigger, but still as sharp. The device itself is light in the hand. I have an incase which protects it from my clumsy hands, which adds a bit of bulk, but its a reassuring bulk I’m more than happy with. The phone still fits in my pocket comfortably.

    Setting up was a breeze and playing around with the settings and throwing some apps onto the device let me see how customisable the phone actually was. This is where I came across my first problem. I’m probably the only person who could complain about it being too customisable. By that I don’t mean the amount of settings or apps that can be installed and changed, I mean the inter-app connectivity. Certain apps just don’t work well together. Others require other apps to be installed when it looks like a simple bit of code could work in the main app. Being the way I am, I continued on and managed to get a decent set up that worked for me.

    The next annoyance I had was the notifications. Android is renowned for its quality notifications, but I’ve became so used to the iPhone system of something popping up, swiping, and heading straight to that app. Again, where theres an issue, theres an app and there were a multitude there to take the iPhones lock-screen place. NiLS, cant do the “Swipe to unlock” per app as its a widget, and widgets don’t have the capability to read gestures. Full screen replacements work a lot better, but don’t integrate as well with the system when using a PIN Code to unlock (the main point for me was not changing the wallpaper to match the currently selected lock screen).

    All in all, these are not the worst criticisms for a phone. I came to Android to see the difference, and I’m trying to set the device up as if its an iPhone. It’s all about changing my workflow.

    Then a few software issues cropped up. Again, nothing too serious (well, the alarm not sounding was pretty annoying – good think I woke up early that day!) but just buggy.

    The Alarm didn’t sound one morning. I couldn’t figure out why not until I went to change the alarm tone. There were no tones listed. No stock tones. Nothing, excluding one option which just unhelpfully stated “14”. Thats it. I then had a peek in message tones and ringtones, again, with the same “14” shown and nothing else. Wondering if I managed to delete ringtones from the device without realising, I downloaded an app which let me download ringtones, and after a few minutes, I had one ringtone set. I figured if it was a bug, adding a new ringtone should load the rest back up again, but I had no such luck. A quick power cycle seemed to clear this up. Not ideal.

    Another annoyance is the two-photo app setup. Gallery, for all the devices images (and online albums from Facebook, Picasa etc) and Photos, for images from Google+. Why there is two apps I have no idea. Which lead me to an interesting discovery. The Gallery app would not show any images I had saved when browsing the internet via Chrome. I know I downloaded the images, I saw the little download bar, but I could find them anywhere on the system. Same with PDF files. I downloaded a few, and they opened fine from the download bar, but using Adobe Reader for Android gave me a “File is Corrupt” warning. Even though, I was reading them fine from the download app. After a bit of Google Searching, I discovered that the security permissions for Android had recently changed, which meant that UNIX style permissions were being enforced more stringently. This means that there was a chance that apps reading and writing to other app’s folders and files was a no no. I can see the positive argument for this, given that the system is so open its open to abuse, but I think giving the user the ability to revert back to the old “permission” system would work better.

    And then there was the Amazon MP3 app. This app alone is worth of an entire blog post. In fact, its the reason i’m writing this post just now. I’m currently waiting on a 1.4Gb Samsung ROM to download to make sure I’m not going crazy.

    The Amazon Cloud MP3 app works brilliantly, as long as your playing from the cloud. Thats not always the best option, and given my limited (and often breached) monthly data limit, not something I would like to do on a regular basis. Its a good thing that the app allows you to download for offline use! Well. At least its meant to. Hitting the download button on either a song or an album, I get to watch the progress bar fill up, followed by a nice big tick to say the song/album has downloaded. I also get a notification to tell me the song/album has downloaded. Hitting the song in the app after its downloaded unhelpfully reminds me that its streaming. Not a great start. Pressing the notification or going to the “Your Device” section in the app greets me with a wonderful “No Music on Your Device” message. Wonderful. No matter how many items I’ve downloaded. No matter how many times I’ve uninstalled, reinstalled, force closed, cleared the cache, and swore at the app, it does not have any music in the “My Device” Section.

    Hooking the phone up to my computer and using the Android Transfer Tool, I can see in the Amazon MP3 folder all the music and albums I’ve tried to download. All the file sizes look correct. All the names are right. I just cant transfer them from the device. Its so frustrating that I factory-reset the device just to see if it was a bad setting somewhere (after an hour installing ADB in Ubutnu JUST to get a recovery menu started on the phone).


    I wrote the above on May 28th, 2014 at 10:01, at 14:20.

    Whats happened in the intervening 3 and a bit months? Well. I fixed the Amazon MP3 issue by conducting a complete re-install of the phone. That also fixed the ringtone issue. I keep the handset for 2 weeks, and I loved it. However I missed the integration. I have a few Apple TV’s, an iPad, a Mac Mini. My friends and family all have iPhones and/or iPads. I didn’t realise just how much I used AirPlay, or AirDrop. I loved the customisability of Android, but it also brought a lot of problems. Due to the sheer customisability of the software, small things were missed out (like the PIN lock screen mentioned above). These small were small annoyances, but annoyances all the same. The hardware and software wasn’t as well integrated as Apple. Again, small first-world problems, but problems all the same.

    I eventually sold the Galaxy S4 on eBay for £185. I replaced it with a temporary iPhone 5C which another family member took out as an upgrade (but was still happy with the Galaxy S3 they had). As soon as the new iPhone is launched I’ll pass this handset back to its rightful owner, and make a my family a family of Apple Users.

    Maybe I’m a real fan-boy after all?

  • Radxa Rock – Unboxing, setup and bootup

    Radxa Rock – Unboxing, setup and bootup

    So I finally found a few minutes to set up my Radxa Rock. I’m still not to sure on how to say the name.

    It’s a pretty nifty little machine. I’ll have to spend some time with the documentation to see exactly what I can make it do (or not!).

    RRP-7The video is 18 minutes long, and in HD. It’s a good thing YouTube decided to increase the video limit to longer than 15 minutes!

    due to its length, it may not play on mobile devices, or anywhere there isn’t a WiFi connection. If it’s needed, I’ll split it into two videos and re-post.

    Enjoy.


  • The Nexus 5 Camera app is rubbish

    They say the best camera you have is the one that’s with you. This is where the Nexus 5 fell down. I had to take a couple of quick photos of my niece, who generally is only still when she’s sleeping. My iPhone 5 normally handles this task with ease. Every now and then, there will be a blurry movement where she was standing, but generally the photo before or after captures a picture in pretty sharp detail. The Nexus 5 introduced a delay after trying the auto focus or tap to focus. This meant that when pressing the volume up button to take a snap, the delay introduced, although minimal, stops perfect snaps being taken. After this, I called Google and arranged a return of the phone.

  • A case for my Raspberry Pi!

    A case for my Raspberry Pi!

    Heres a quick 7 minute video about a case I purchased for the Raspberry Pi that only cost £4 from eBay!

  • Handy Tidbits: Create lots of files on linux quickly for testing

    dd bs=1000000 count=20475 if=/dev/zero | split -b 4095 -a 7 -d – foo.

    foo. (filename), 4095 = filesize (in bytes).

    Taken from a comment by klode at
    http://www.askdavetaylor.com/how_can_i_quickly_create_millions_of_tiny_files_in_linux.html#eb8sC3UpjoMBX0U1.99

  • OSX 10.8.2 localhost directory & MySql / PHPMyAdmin

    You know, just because it will bug me again at some point:

    If for any reason you don’t want to use the “sites” folder for your web development, you can head to

    /Library/WebServer/Documents

    and upload code directly into your http://localhost folder.

    to install PHPMyAdmin, just plop that PHPMyAdmin folder just downloaded right into the above folder.

    To Install MySQL however, follow these steps:

    Download the .dmg MySQL installed from MySQL.com

    Run the first installed, then the auto-start installer, and finally the Preference Pane add-on.

    Run this code in terminal:

    sudo cp /etc/php.ini.default /etc/php.ini

    and then load /etc/php.ini and replace any instance of

    /var/mysql/mysql.sock

    with

    /tmp/mysql.sock

    Start the MySQL server using the preference pane add-on, then run the following in Terminal:

    /usr/local/mysql/bin/mysqladmin -u root password PASSWORD

    Replacing PASSWORD with a password of your choice.

    The last thing to do is head to the PHPMyAdmin directory, and copy the config.sample.inc.php to config.inc.php and edit that file, replacing the

    $cfg['blowfish_secret'] = 'RANDOM BLOWFISH CHARACTERS'; /* YOU MUST FILL IN THIS FOR COOKIE AUTH! */

    RANDOM BLOWFISH CHARACTERS part with random characters!

    Finally, head to http://localhost/phpmyadmin and your good to go!

  • Using only PHP to save Google Starred items to Pocket!

    Using only PHP to save Google Starred items to Pocket!

    So, based on my last post, I wanted to see if I could do everything with PHP. After a bit of google-fu and using the php.net manual, I’ve managed this beauty. Use at your own risk! This works with my Google Starred items, and you still have to obtain the starred.json file from the Google Take Out service (See my last post for more information).

    If you have any tips on how to improve this, drop me a comment!

    <!DOCTYPE html>
    <html>
    <head>
    <meta http-equiv="Content-Type" content="text/html; charset=UTF-8" />
    <title>Instapaper: Export</title>
    </head>
    <body>
    <h1>Unread</h1>
    <ol>
    <?php
    
    // First off, we start by opening the file required (starred.json),
    // Then we set the $galbool paramater (This is used where sites have
    // given a "Gallery" URL (To make it more cosmetic, it appends the
    // text [Gallery] to the end of the description.
    
    $file_handle = fopen("starred.json", "r");
    while (!feof($file_handle)) {
        $galbool = FALSE;
        $line = fgets($file_handle);
    
    // This is our first check. We run through the json file and look for
    // lines that contain the text "href". If it does not have that text,
    // we are not interested, and set that line to be blank.
    
        $preg = "(\"href\")";
        $urlcheck = preg_match($preg, $line);
        if ($urlcheck !== 1) {
        $line = "";
        } else {
    
    // A cheeky little bit of coding. Whislt we are in the loop, and
    // I know that this is a URL we are intersted in, I'll have a look
    // at the last character. If its a ",", I also want to delete that
    // line. Looking at the JSON file, if a line contains a URL and
    // ends with a ",", it means its not the *ACTUAL* URL we want, so
    // we continue our ruthless streak and set that line to blank!
    // (This was included ot deal with hackaday.com URL's, which for
    // some reason doubled up, and this was a quick and easy way to
    // get rid of them!
    
            $preg = "(,)";
            $clean = preg_match($preg, $line);
            if ($clean !== 0) {
                $line = "";
            }
            }
    
    // Now we trim the whitespace and other non-needed characters, and
    // we remove the first bit from the string thats not needed. This
    // takes us right to the http:// part of the link, which is what we
    // need! We also remove the trailing slash from the link as well.
    
            trim($line);
            $line = substr($line, 16);
            $line = substr_replace($line, "", -2);
            $string = $line;
    
            $check = $string[strlen($string)-2];
            if ( $check == "/"){
                $string = rtrim($string);
                $string = rtrim($string, "/");
                $desc = $string;
            }
            $check = $string[strlen($string)-1];
            if ( $check == "/"){
                $string = rtrim($string);
                $string = rtrim($string, "/");
                $desc = $string;
            }
    
    // This is just a quick check to see if the URL passed is a gallery
    // URL. If so, we set the $galbool value to true, and then do our
    // usual URL cleanup. I have removed the /gallery part from the URL
    // This is personal preferance, and I've not had any adverse effects
    // from either taking it in, or removing it. It has to be removed
    // just now to make figuring out the link text easier though.
    // We can add it back in later if required.
    
            $gallerycheck = str_replace("/gallery", "", $string, $count);
            if ($count == 1){
                $galbool = TRUE;
                $string = rtrim($string);
                $string = rtrim($string, "/gallery");
                $desc = $string;
            }
    
    // And now for the (almost) finale! We take everything after the
    // forward slash in the URL, remove that forward slash, then we
    // run through and replace every "-" with a space. This makes the
    // end HTML page look nice, and it keeps with Instapapers Export
    // option. If the $galbool value is true, we create a [Gallery]
    // tag.
    
            $desc = strrchr($string, "/");
            $desc = str_replace("/", "", $desc);
            $desc = str_replace("-", " ", $desc);
            $desc = ucwords($desc);
            if ($string != "" ){
            if ($galbool == TRUE){
    
    // you can add back in the /gallery link here again if you need it!
    // Just uncomment the relevant line and comment out the other!
    //        -------------------------------------------------------------------------------------------------
    
    //        $formatted = '            <li><a href="' . $string . '/gallery">' . $desc . '[Gallery]</a></li>';
    
    //        ----------------------------------***OR THIS LINE***---------------------------------------------
    
            $formatted = '            <li><a href="' . $string . '">' . $desc . '[Gallery]</a></li>';
    
    //        -------------------------------------------------------------------------------------------------
    
            } else {
            $formatted = '            <li><a href="' . $string . '">' . $desc . '</a></li>';
            }
            echo $formatted;
            }
        }
    
    // We now close the file (good housekeeping), and finish up
    // the script.
    
    fclose($file_handle);
    ?>
    </ol>
    </body>
    </html>


  • Using the terminal & PHP to save Google Reader Starred items!

    Using the terminal & PHP to save Google Reader Starred items!

    *MAJOR UPDATE* – USING PHP ONLY WITH NEW CODE! Please view this next post for more information!

    So. Google Reader is closing down. I’m not going to get all high and mighty – It’s Google’s product. They do with it as they wish! There are several places that let you save your feeds from Google Reader, but I wanted to add all my Starred Items from Reader into Pocket. It turns out it wasn’t the easiest thing to do! After a few terminal commands and some PHP, this is what I came up with!

    Firstly, head to Google Reader, and use the Data Takeout feature that Google provides to save your Reader Data only. The outputted ZIP file should contain a folder entitled “Reader”. Within that, there should be a file named “starred.json”.

    *UPDATE* – I have saved these 2 files to GitHub! Go, Grab!
    https://github.com/nickwebcouk/pocketimport

    Now the fun begins! To make it easy (and quick) I used the Terminal on Mac and ran these commands within the above folder. I used two files (new.txt and newnew.txt) just to keep track of what was happening. There are easier ways of doing this! I ran the following commands from terminal:

    grep -a1 "canonical" starred.json > new.txt
    grep -v "^\--" new.txt > newnew.txt
    grep -v "} ]," newnew.txt > new.txt
    grep -v "\"canonical\" : \[ {" new.txt > newnew.txt
    grep -v "\"updated" newnew.txt > new.txt
    grep -v "} \]," new.txt > newnew.txt
    cat newnew.txt | rev | cut -c 2- | rev > new.txt
    cut -c 17- new.txt > newnew.txt
    rm -r new.txt
    mv newnew.txt url.txt

    The “grep” command looks through text files for specific expressions. “cat” outputs a full file, “rev” reverses items, “cut” cuts text, “rm” removes files and “mv” moves files.

    To make this easier, I created a Shell Script (Tested on OSX 10.8.2 only)

    #!/bin/sh
    
    clear
    grep -a1 "canonical" starred.json > new.txt
    grep -v "^\--" new.txt > newnew.txt
    grep -v "} ]," newnew.txt > new.txt
    grep -v "\"canonical\" : \[ {" new.txt > newnew.txt
    grep -v "\"updated" newnew.txt > new.txt
    grep -v "} \]," new.txt > newnew.txt
    cat newnew.txt | rev | cut -c 2- | rev > new.txt
    cut -c 17- new.txt > newnew.txt
    rm -r new.txt
    mv newnew.txt url.txt

    You can run that file by saving it to the same location as the Google Reader folder, and running the following in terminal first:

    chmod 755 script.sh
    ./script.sh

    the first line tells the computer to allow script.sh to be executed, and the second line executes the script.

    I then moved the url.txt file that had just been created to my www root folder (for me its under /users/~name/sites/), and created the following PHP/HTML code:

    <!DOCTYPE html>
    <html>
    <head>
    <meta http-equiv="Content-Type" content="text/html; charset=UTF-8" />
    <title>Instapaper: Export</title>
    </head>
    <body>
    <h1>Unread</h1>
    <ol>
    <?php
        $file_handle = fopen("url.txt", "r");
        while (!feof($file_handle)) {
            $galbool = FALSE;
            $line = fgets($file_handle);
            $string = $line;
            $check = $string[strlen($string)-2];
            if ( $check == "/"){
                $string = rtrim($string);
                $string = rtrim($string, "/");
                $desc = $string;
            }
            $gallerycheck = str_replace("/gallery", "", $string, $count);
            if ($count == 1){
                $galbool = TRUE;
                $string = rtrim($string);
                $string = rtrim($string, "/gallery");
                $desc = $string;
            }
            $desc = strrchr($string, "/");
            $desc = str_replace("/", "", $desc);
            $desc = str_replace("-", " ", $desc);
            $desc = ucwords($desc);
            if ($galbool == TRUE){
            $formatted = '			<li><a href="' . $string . '">' . $desc . '[Gallery]</a></li>';
            } else {
            $formatted = '			<li><a href="' . $string . '">' . $desc . '</a></li>';
            }
            echo $formatted;
        }
        fclose($file_handle);
    ?>
    </ol>
    </body>
    </html>

    This provided me with a HTML page, which if saved as instapaper-export.html allowed me to head to getpocket.com and use the Instapaper import option.

    584 starred articles and 2 seconds later, I received this wonderful little message!

    getpocket import


  • Custom Invitations using PHP!

    People often don’t realise how versatile PHP and its add-on’s, including Imagik can be. I’ve used the following code in the past, and again recently, and I always receive comments on how nicely created invitations are. Its the personal touch that does it!

    Firstly, I created an invitation using the awesome Pixelmator for Mac. You can use Gimp or Photoshop, or whatever takes your fancy, but what your looking for is a nice invitation with room for peoples names, like this:

    Pre-PHP processing

    (I’ve saved this as a PNG file)

    Next up, some pre-processing work is required. I’ll go into this stuff in more detail in future blog posts, but what you want to do is set up a LAMP install (Linux, Apache, MySql and PHP). Make sure you have Imagik installed. You then want to install PHPMyAdmin, and create a database and one table with 2 columns (ID and Name).

    ID Name
    1 Nick T
    2 Mr. A. N. Other

    You can then plop the following code into your root directory, customise as needed, and away you go!

    <?php
    $con=mysqli_connect("localhost","USERNAME","PASSWORD","DATABASENAME");
    // Check connection
    if (mysqli_connect_errno())
    {
    echo "Failed to connect to MySQL: " . mysqli_connect_error();
    }
    // Database connection has passed, now to select ALL the data from the Table "NAME"
    $result = mysqli_query($con,"SELECT * FROM name");
    while($row = mysqli_fetch_array($result)) //Grab everything and put it into an array
    { //Start the loop
    $image = new Imagick('siteinfo.png'); //The name of the background image
    $draw = new ImagickDraw(); //Tell imagick were going to draw on this image
    $draw->setGravity (Imagick::GRAVITY_CENTER); //Centre our Text
    $draw->setFillColor('black'); //Set the font colour to BLACK
    $draw->setFont("/var/www/skia.ttf"); //Load the font we want to use
    $draw->setFontSize( 40 ); //Set our font size
    $text = $row['name']; //Place the name into a variable
    $image->annotateImage($draw, 240, -150, 0, $text); //Write this name into the image at the location specified
    $image->setImageFormat('jpg'); //Tell imagick were going to save it as a JPG
    $name = $row['id'] . ".jpg"; //Give it the file name of its ROW in the database
    $image->writeImages($name, TRUE); //Save it to the root folder (where the script was ran)
    } //Lather, Rinse, Repeat!
    mysqli_close($con); //Close the MySQL connection
    ?>

    One of the important functions in the above script is the

    $image->annotateImage($draw, 240, -150, 0, $text); //Write this name into the image at the location specified

    Using the awesome documentation online at PHP.net, you find out that the 3 numbers, in order mean X position, Y position and angle. Angle is set to 0 because I don’t want the text angled. A nice straight line of text. The X position relates to where in the image the text is placed horizontally, and the Y relates to the vertical position. There was no hard and fast way to figure out those numbers, so I played about with them until I was happy. There is more than likely a function already created, or you could write your own that works out the exact location, but for my needs, a little bit of guessing with a small sample yielded pretty good results!

    After running that PHP file, you get this at the other end:

    Image 1
    Image 1

    and

    Image 2
    Image 2

    The above took less than 1 second to produce, once the script was ran. I used this to create over 60 invites, and that took around 10 seconds of script execution time! (If I remember, I’ll put in a timer to see how long exactly it took. Bare in mind this was completed on the Ubuntu Laptop – which isn’t exactly a powerhouse!)

    I’m fully aware that there was probably a workflow for Automator on the Mac which I could have used – but its nice to keep the PHP skills going for little things like this!

    UPDATE: Using the 2 names above, the script was executed in 0.74 seconds – This is on a Dual Core Intel(R) CPU T1400 @ 1.73GHz with 1Gb of RAM.

    UPDATE 2: Using 59 names from the database, the script was executed in 6.01 seconds. Not bad!

  • Using a Windows 7 Upgrade disc with Bootcamp fresh install

    I came across a problem when installing Windows 7 to my Mac using Bootcamp. I purchased my copy of Windows 7 when I had my older Windows PC  meaning I was eligible for the upgrade pricing. Using a Mac, however meant I couldn’t use the upgrade disc. Seeing as I don’t use my Windows PC anymore (it’s since been wiped and Ubuntu installed) I think I’m entitled to use the software I purchased on my Mac! The installation runs fine, with no issues, except when you enter your Product Key in. Windows gives you a nice error during install saying the Key is Invalid. It still allows you to install Windows 7, but you must reactivate within 3 days.
    The quickest, and easiest way to activate Windows 7 using your own Product Key is to do the following:
    1- Open up regedit (Click the Start Orb, type regedit and press enter)
    2- Navigate to HKEY_LOCAL_MACHINE/Software/Microsoft/Windows/CurrentVersion/Setup/OOBE/
    3- On the right hand side, double click MediaBootInstall and change the value to (from 1)
    4- Close regedit, and start a command prompt as an administrator
    5- Enter slmgr /rearm and wait for a message box telling you the command completed successfully
    6- Reboot your Mac
    7- Click Start, and type Activate Windows
    8- Enter your Product Key and click OK.

    Easy as pie! Special Thanks to Justin Kerr of the MaximumPC blog for the information. Their site has pictures that can also be followed!